


Leaderboard
-
Noob
Supporter75Points321Posts -
stasys
Members14Points31Posts -
Hazza12555
Members11Points74Posts -
shak-otay
Engineers11Points1,455Posts


Popular Content
Showing content with the highest reputation since 06/04/2026 in Posts
-
4 pointsWe are currently testing whether we can retrieve character IDs from the database and read all related data4 points
-
4 points4 points3 pointsNew Version of TASM 1+2 Tools Audio is now sorted/named Also sorted into languages.3 pointsApparently there is a bug with Default Berri's hair Fur Shells are currently merging her Hair and Body material, due to an oversight in how the shells are drawn, getting a fix done now EDIT Here's the updated script RBMimport_12.py3 points2 points2 pointsadded extraction support, should work on files with versions beside 1.2 but untested same with compressed files: https://github.com/smiRaphi/UniPyX/commit/10b71fe85dbc064334ff472caadb6525fb1b5b852 points2 pointsPython 3.X import argparse import struct import sys import threading import zlib from dataclasses import dataclass from pathlib import Path, PurePosixPath MAGIC = b"D0" @dataclass(frozen=True) class PackEntry: name: str offset: int stored_size: int original_size: int stored_raw: bool def u16(data: bytes, offset: int) -> int: return struct.unpack_from("<H", data, offset)[0] def u32(data: bytes, offset: int) -> int: return struct.unpack_from("<I", data, offset)[0] def parse_pack(data: bytes) -> tuple[int, list[PackEntry]]: if len(data) < 8: raise ValueError("The file is too small to contain a D0 pack header.") if data[:2] != MAGIC: raise ValueError(f"Unsupported magic {data[:2]!r}; expected {MAGIC!r}.") index_end = u32(data, 2) entry_count = u16(data, 6) if not (8 <= index_end <= len(data)): raise ValueError(f"Invalid index end offset: 0x{index_end:X}.") index_pos = 8 raw_entries: list[tuple[str, int, int, bool]] = [] for entry_index in range(entry_count): name_end = data.find(b"\0", index_pos, index_end) if name_end < 0: raise ValueError(f"Missing file-name terminator in index entry {entry_index}.") if name_end + 9 > index_end: raise ValueError(f"Truncated metadata in index entry {entry_index}.") name = data[index_pos:name_end].decode("utf-8", "replace") packed_size_field = u32(data, name_end + 1) original_size = u32(data, name_end + 5) stored_raw = bool(packed_size_field & 0x80000000) stored_size = packed_size_field & 0x7FFFFFFF if not name or stored_size == 0: raise ValueError(f"Invalid index entry {entry_index} at 0x{index_pos:X}.") raw_entries.append((name, stored_size, original_size, stored_raw)) index_pos = name_end + 9 if index_pos != index_end: raise ValueError( f"Index parsed to 0x{index_pos:X}, but header declares 0x{index_end:X}." ) entries: list[PackEntry] = [] data_pos = index_end for name, stored_size, original_size, stored_raw in raw_entries: data_end = data_pos + stored_size if data_end > len(data): raise ValueError(f"Resource {name!r} extends past the end of the container.") entries.append( PackEntry( name=name, offset=data_pos, stored_size=stored_size, original_size=original_size, stored_raw=stored_raw, ) ) data_pos = data_end if data_pos != len(data): raise ValueError( f"Resource data ends at 0x{data_pos:X}, but file ends at 0x{len(data):X}." ) return index_end, entries def safe_relative_path(name: str) -> Path: normalized = name.replace("\\", "/") parts = [] for part in PurePosixPath(normalized).parts: if part in ("", ".", "/"): continue if part == "..": continue clean = part.replace(":", "_") parts.append(clean) if not parts: raise ValueError(f"Resource name {name!r} does not contain a safe path.") return Path(*parts) def decompress_payload(payload: bytes, entry: PackEntry) -> bytes: if entry.stored_raw or entry.stored_size == entry.original_size: return payload errors: list[str] = [] for window_bits in (zlib.MAX_WBITS, -zlib.MAX_WBITS): try: output = zlib.decompress(payload, window_bits) if entry.original_size and len(output) != entry.original_size: raise ValueError( f"decompressed size {len(output)} does not match {entry.original_size}" ) return output except Exception as exc: errors.append(str(exc)) raise ValueError(f"Could not decompress {entry.name!r}: {'; '.join(errors)}") def extract_pack(input_path: Path, output_dir: Path, preserve_folders: bool = True) -> list[Path]: data = input_path.read_bytes() _, entries = parse_pack(data) output_dir.mkdir(parents=True, exist_ok=True) written: list[Path] = [] for index, entry in enumerate(entries, 1): payload = data[entry.offset : entry.offset + entry.stored_size] output = decompress_payload(payload, entry) relative = safe_relative_path(entry.name) if not preserve_folders: relative = Path(f"{index:04d}_{relative.name}") output_path = output_dir / relative output_path.parent.mkdir(parents=True, exist_ok=True) output_path.write_bytes(output) written.append(output_path) return written def summary_text(input_path: Path, index_end: int, entries: list[PackEntry]) -> str: raw_count = sum(entry.stored_raw for entry in entries) compressed_count = len(entries) - raw_count lines = [ f"Container: {input_path.name}", f"Magic: {MAGIC.decode('ascii')}", f"Index end: 0x{index_end:X}", f"Entries: {len(entries)}", f"Raw entries: {raw_count}", f"Compressed entries: {compressed_count}", "", ] for entry in entries[:80]: mode = "raw" if entry.stored_raw else "compressed" lines.append( f"0x{entry.offset:08X} {entry.stored_size:9d} {mode:10s} {entry.name}" ) if len(entries) > 80: lines.append(f"... {len(entries) - 80} more entries") return "\n".join(lines) def run_gui() -> None: import tkinter as tk from tkinter import filedialog, messagebox, scrolledtext, ttk root = tk.Tk() root.title("D0 Packres Extractor") root.geometry("800x540") root.resizable(True, True) default_file = Path("packres-android_core.png") input_var = tk.StringVar(value=str(default_file.resolve()) if default_file.exists() else "") output_var = tk.StringVar(value=str((Path.cwd() / "_packres_android_core_extract").resolve())) folders_var = tk.BooleanVar(value=True) status_var = tk.StringVar(value="Ready") frame = ttk.Frame(root, padding=12) frame.pack(fill="both", expand=True) frame.columnconfigure(1, weight=1) frame.rowconfigure(5, weight=1) def browse_input() -> None: path = filedialog.askopenfilename( title="Choose packres container", filetypes=[("Packres files", "*.png *.dat *.bin"), ("All files", "*.*")], ) if path: input_var.set(path) source = Path(path) output_var.set(str(source.with_name(source.stem + "_extract"))) def browse_output() -> None: path = filedialog.askdirectory(title="Choose output folder") if path: output_var.set(path) def set_log(text: str) -> None: log.configure(state="normal") log.delete("1.0", "end") log.insert("1.0", text) log.configure(state="disabled") def scan_clicked() -> None: try: input_path = Path(input_var.get().strip()) if not input_path.is_file(): raise ValueError("Input file does not exist.") index_end, entries = parse_pack(input_path.read_bytes()) set_log(summary_text(input_path, index_end, entries)) status_var.set(f"Scan complete: {len(entries)} entries.") except Exception as exc: status_var.set("Scan failed") messagebox.showerror("Scan failed", str(exc)) def extract_clicked() -> None: def worker() -> None: try: input_path = Path(input_var.get().strip()) output_dir = Path(output_var.get().strip()) if not input_path.is_file(): raise ValueError("Input file does not exist.") written = extract_pack(input_path, output_dir, folders_var.get()) index_end, entries = parse_pack(input_path.read_bytes()) text = summary_text(input_path, index_end, entries) text += f"\n\nWrote {len(written)} file(s) to:\n{output_dir}" root.after(0, lambda: set_log(text)) root.after(0, lambda: status_var.set(f"Extracted {len(written)} file(s).")) root.after( 0, lambda: messagebox.showinfo( "Extract complete", f"Extracted {len(written)} file(s)." ), ) except Exception as exc: root.after(0, lambda: status_var.set("Extract failed")) root.after(0, lambda: messagebox.showerror("Extract failed", str(exc))) status_var.set("Extracting...") threading.Thread(target=worker, daemon=True).start() ttk.Label(frame, text="Input Container").grid(row=0, column=0, sticky="w", padx=6, pady=6) ttk.Entry(frame, textvariable=input_var).grid(row=0, column=1, sticky="ew", padx=6, pady=6) ttk.Button(frame, text="Browse", command=browse_input).grid(row=0, column=2, padx=6, pady=6) ttk.Label(frame, text="Output Folder").grid(row=1, column=0, sticky="w", padx=6, pady=6) ttk.Entry(frame, textvariable=output_var).grid(row=1, column=1, sticky="ew", padx=6, pady=6) ttk.Button(frame, text="Browse", command=browse_output).grid(row=1, column=2, padx=6, pady=6) ttk.Checkbutton(frame, text="Preserve folders", variable=folders_var).grid( row=2, column=0, columnspan=2, sticky="w", padx=6, pady=8 ) buttons = ttk.Frame(frame) buttons.grid(row=3, column=0, columnspan=3, sticky="e", padx=6, pady=8) ttk.Button(buttons, text="Scan", command=scan_clicked).grid(row=0, column=0, padx=6) ttk.Button(buttons, text="Extract", command=extract_clicked).grid(row=0, column=1, padx=6) ttk.Label(frame, textvariable=status_var).grid( row=4, column=0, columnspan=3, sticky="w", padx=6, pady=4 ) log = scrolledtext.ScrolledText(frame, wrap="none", state="disabled") log.grid(row=5, column=0, columnspan=3, sticky="nsew", padx=6, pady=6) root.mainloop() def parse_args(argv: list[str]) -> argparse.Namespace: parser = argparse.ArgumentParser(description="Extract D0 packres containers.") parser.add_argument("input", nargs="?", help="Input packres file.") parser.add_argument("-o", "--output", help="Output folder. Default: <input>_extract") parser.add_argument("--flat", action="store_true", help="Do not preserve resource folders.") parser.add_argument("--scan-only", action="store_true", help="Only display the index.") parser.add_argument("--gui", action="store_true", help="Open the graphical interface.") return parser.parse_args(argv) def main(argv: list[str] | None = None) -> int: args = parse_args(sys.argv[1:] if argv is None else argv) if args.gui or not args.input: run_gui() return 0 input_path = Path(args.input) output_dir = Path(args.output) if args.output else input_path.with_name(input_path.stem + "_extract") data = input_path.read_bytes() index_end, entries = parse_pack(data) print(summary_text(input_path, index_end, entries)) if args.scan_only: return 0 written = extract_pack(input_path, output_dir, preserve_folders=not args.flat) print(f"\nWrote {len(written)} file(s) to {output_dir}") return 0 if __name__ == "__main__": raise SystemExit(main())
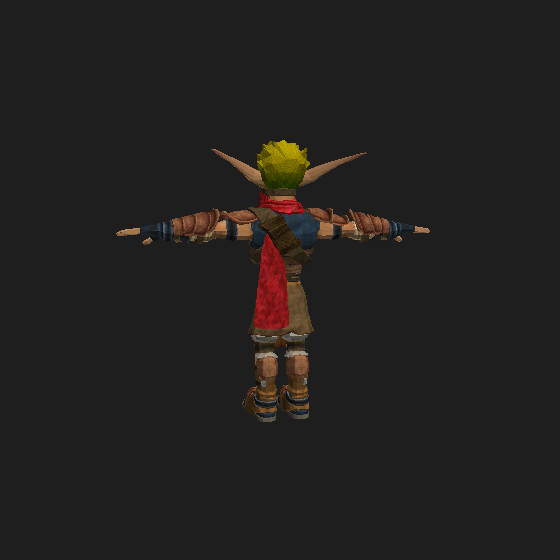
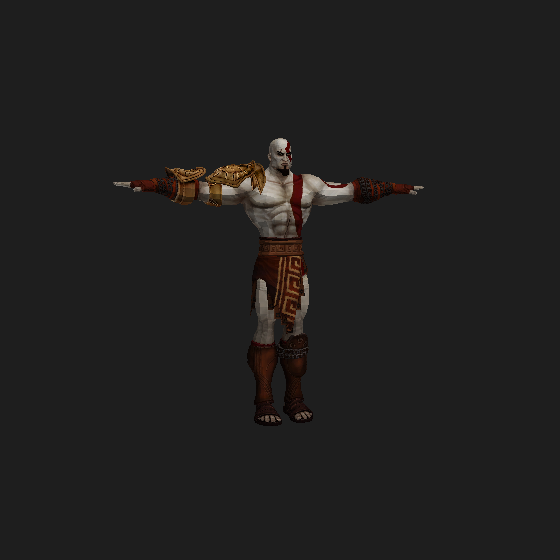
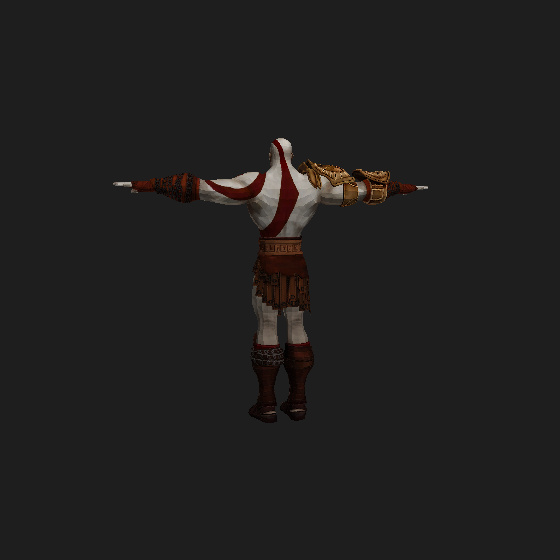
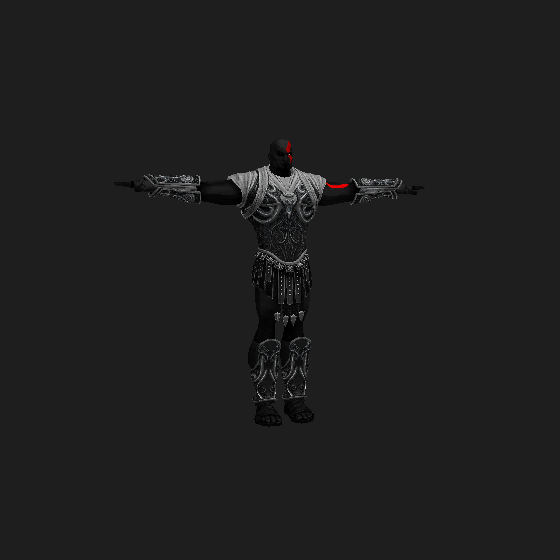
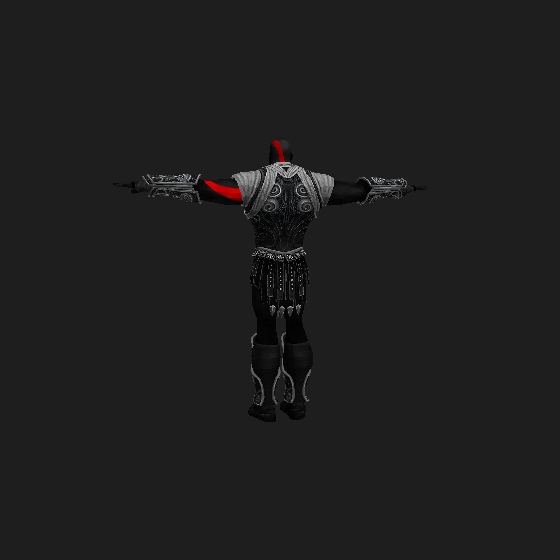
 2 pointsAdded rigging to all models in the form of a .glb model. Fixed some bugs2 points2 pointsthese .lsc files are a custom container, magic NKDB (Nikke Database). All big-endian. Layout: 0x00 "NKDB" 0x04 version (uint32) = 1 0x08 16-byte key/IV (unique per file) 0x18 flag uint32 = 0x1000 (4096) - same in every file 0x1C record count (uint32) 0x20 offset table: count × uint32 (absolute offsets) + 4 pad bytes ... data section: records back-to-back Record size = offset[i+1] - offset, last one runs to EOF. The offset table checks out perfectly (monotonic, no gaps, matches file size), so reading the container is trivial. The record payloads are encrypted. Data section entropy is a flat 8.0 bits/byte and the byte distribution is dead uniform (all 256 values ~0.39% each), which screams AES, not compression (no magic bytes, no skew). Record sizes aren't multiples of 16, so it's a stream mode (CTR/CFB/OFB/GCM), not ECB/CBC. The 16 bytes in the header are almost certainly a per-file IV/nonce or key-id, the actual AES key isn't in the file, it lives in the game client (il2cpp binary). Tried XOR and AES with the header bytes as the key, nothing decrypts, so don't bother going down that road. You'll need to pull the key from GameAssembly/libil2cpp to read the actual locale text (probably JSON/table rows once decrypted).2 pointsInstead of just dumping files without explanation, you need to explain what you're trying to do, what you've already tried, etc. And read the rules, or these low effort posts will be deleted.2 pointsIn dc3c2177 there are multiple meshes, for the last one: At 1421408, 320 x 3 shorts (position?) At 1423344, 320 x 3 shorts in range [-4096;4096] (normals?) At 1425278, 320 x 2 shorts (UV, divide by 4096) At 1426576, 384 shorts (indices) UV looks fine, but mesh is a mess
 2 points2 pointsAdded support for it and also for the .res (magic: "ins\0") & .tm2col (just a collection of TIM2 images) subfiles https://github.com/smiRaphi/UniPyX/commit/ddb91627fb759da2ef71f940c9a39f1e0b651fac2 points2 points.IMG files have zlib blocks. To extract them correctly with names, you need an .IND file. .IMG = Data .IND = Index You must have .img and .ind files with the same name in the same folder to extract the files. import argparse import re import struct import sys import threading import zlib from dataclasses import dataclass from pathlib import Path from typing import Callable, Iterable ZLIB_HEADERS = {b"\x78\x01", b"\x78\x5e", b"\x78\x9c", b"\x78\xda"} INVALID_NAME_CHARS = re.compile(r'[<>:"/\\|?*\x00-\x1f]') class ImgIndError(Exception): pass @dataclass class IndexEntry: index: int name: str offset: int end_offset: int = 0 def read_u16le(data: bytes, offset: int) -> int: return struct.unpack_from("<H", data, offset)[0] def read_u32le(data: bytes, offset: int) -> int: return struct.unpack_from("<I", data, offset)[0] def clean_name(raw: bytes) -> str: return raw.split(b"\x00", 1)[0].decode("ascii", "replace").strip() def safe_filename(name: str) -> str: name = INVALID_NAME_CHARS.sub("_", name).strip(" .") return name or "unnamed.bin" def guess_extension(data: bytes) -> str: if data.startswith(b"\xff\xfb") or data.startswith(b"ID3"): return ".mp3" if data.startswith(b"\x0a") and len(data) > 4: return ".pcx" if len(data) >= 18 and data[2] in {1, 2, 3, 9, 10, 11}: width = int.from_bytes(data[12:14], "little") height = int.from_bytes(data[14:16], "little") bpp = data[16] if 0 < width <= 8192 and 0 < height <= 8192 and bpp in {8, 15, 16, 24, 32}: return ".tga" if data.startswith(b"RIFF") and data[8:12] == b"WAVE": return ".wav" if data.startswith(b"DDS "): return ".dds" if data.startswith(b"\x89PNG\r\n\x1a\n"): return ".png" return ".bin" def resolve_img_path(ind_path: Path) -> Path: candidates = [ ind_path.with_suffix(".IMG"), ind_path.with_suffix(".img"), ind_path.with_suffix(".Img"), ] for candidate in candidates: if candidate.exists(): return candidate raise ImgIndError(f"Matching .IMG file not found for {ind_path.name}") def parse_ind(ind_path: Path, img_size: int) -> tuple[str, list[IndexEntry]]: data = ind_path.read_bytes() if len(data) < 2: raise ImgIndError(f"{ind_path.name} is too small for an index") count = read_u16le(data, 0) named_size = 2 + count * 24 offset_only_size = 2 + count * 4 entries: list[IndexEntry] = [] if len(data) == named_size: layout = "named" for index in range(count): pos = 2 + index * 24 name = clean_name(data[pos:pos + 20]) offset = read_u32le(data, pos + 20) entries.append(IndexEntry(index, name, offset)) elif len(data) == offset_only_size: layout = "offsets_only" stem = ind_path.stem for index in range(count): pos = 2 + index * 4 offset = read_u32le(data, pos) entries.append(IndexEntry(index, f"{stem}_{index:04d}", offset)) else: raise ImgIndError( f"{ind_path.name}: unsupported index size {len(data)} for count {count}; " f"expected {named_size} or {offset_only_size}" ) if not entries: return layout, entries ordered = sorted(entries, key=lambda item: item.offset) for i, entry in enumerate(ordered): next_offset = ordered[i + 1].offset if i + 1 < len(ordered) else img_size if entry.offset < 0 or entry.offset > img_size: raise ImgIndError(f"{ind_path.name}: entry {entry.index} offset exceeds IMG size") if next_offset < entry.offset: raise ImgIndError(f"{ind_path.name}: entry offsets are not monotonic") entry.end_offset = next_offset return layout, entries def unique_output_path(out_dir: Path, filename: str, used: set[str]) -> Path: filename = safe_filename(filename) stem = Path(filename).stem suffix = Path(filename).suffix if not suffix: suffix = ".bin" candidate = f"{stem}{suffix}" counter = 1 while candidate.lower() in used: candidate = f"{stem}_{counter:04d}{suffix}" counter += 1 used.add(candidate.lower()) return out_dir / candidate def unpack_block(block: bytes) -> tuple[bytes, int | None, bool, str]: if len(block) >= 6 and block[4:6] in ZLIB_HEADERS: expected = read_u32le(block, 0) try: output = zlib.decompress(block[4:]) except zlib.error as exc: return block, expected, False, f"zlib error: {exc}" status = "ok" if expected != len(output): status = f"size mismatch: expected {expected}, got {len(output)}" return output, expected, True, status return block, None, False, "raw" def extract_pair( ind_path: Path, output_root: Path | None = None, limit: int | None = None, log: Callable[[str], None] | None = None, ) -> Path: ind_path = ind_path.resolve() img_path = resolve_img_path(ind_path).resolve() img_size = img_path.stat().st_size layout, entries = parse_ind(ind_path, img_size) output_root = output_root or ind_path.parent / "_europeracer_imgind_extract" pair_out = output_root / ind_path.stem pair_out.mkdir(parents=True, exist_ok=True) if limit is not None: entries = entries[:limit] if log: log(f"{ind_path.name}: {len(entries)} entries, layout={layout}") used_names: set[str] = set() with img_path.open("rb") as img_file: for entry in entries: packed_size = entry.end_offset - entry.offset img_file.seek(entry.offset) block = img_file.read(packed_size) unpacked, _expected_size, _compressed, status = unpack_block(block) filename = entry.name if not Path(filename).suffix: filename += guess_extension(unpacked) out_path = unique_output_path(pair_out, filename, used_names) out_path.write_bytes(unpacked) if log and (entry.index % 100 == 0 or entry.index == entries[-1].index): log(f" {entry.index + 1}/{len(entries)} {entry.name} -> {out_path.name}") if log and status not in {"ok", "raw"}: log(f" warning: {entry.name}: {status}") if log: log(f"Done: {pair_out}") return pair_out def find_ind_files(input_path: Path) -> list[Path]: if input_path.is_dir(): found: dict[str, Path] = {} for pattern in ("*.IND", "*.ind"): for path in input_path.glob(pattern): found[str(path.resolve()).lower()] = path return sorted(found.values(), key=lambda path: path.name.lower()) if input_path.suffix.lower() == ".ind": return [input_path] raise ImgIndError("Select an .IND file or a folder containing .IND/.IMG pairs") def extract_input( input_path: Path, output_dir: Path | None = None, limit: int | None = None, log: Callable[[str], None] | None = None, ) -> list[Path]: ind_files = find_ind_files(input_path) if not ind_files: raise ImgIndError(f"No .IND files found in {input_path}") output_dir = output_dir or (input_path if input_path.is_dir() else input_path.parent) / "_europeracer_imgind_extract" results = [] for ind_path in ind_files: results.append(extract_pair(ind_path, output_dir, limit=limit, log=log)) return results def run_gui() -> None: import tkinter as tk from tkinter import filedialog, messagebox, ttk root = tk.Tk() root.title("Europe Racer IMG/IND Extractor") root.geometry("760x520") input_var = tk.StringVar() output_var = tk.StringVar() status_var = tk.StringVar(value="Select an .IND file or a folder with .IND/.IMG pairs.") frame = ttk.Frame(root, padding=12) frame.pack(fill="both", expand=True) frame.columnconfigure(1, weight=1) frame.rowconfigure(4, weight=1) ttk.Label(frame, text="Input").grid(row=0, column=0, sticky="w", padx=(0, 8), pady=4) ttk.Entry(frame, textvariable=input_var).grid(row=0, column=1, sticky="ew", pady=4) def choose_file() -> None: path = filedialog.askopenfilename( title="Select IND file", filetypes=[("IND files", "*.ind *.IND"), ("All files", "*.*")], ) if path: input_var.set(path) def choose_folder() -> None: path = filedialog.askdirectory(title="Select folder with IMG/IND pairs") if path: input_var.set(path) ttk.Button(frame, text="IND File", command=choose_file).grid(row=0, column=2, padx=4) ttk.Button(frame, text="Folder", command=choose_folder).grid(row=0, column=3, padx=4) ttk.Label(frame, text="Output").grid(row=1, column=0, sticky="w", padx=(0, 8), pady=4) ttk.Entry(frame, textvariable=output_var).grid(row=1, column=1, sticky="ew", pady=4) def choose_output() -> None: path = filedialog.askdirectory(title="Select output folder") if path: output_var.set(path) ttk.Button(frame, text="Browse", command=choose_output).grid(row=1, column=2, padx=4) progress = ttk.Progressbar(frame, mode="indeterminate") progress.grid(row=2, column=0, columnspan=4, sticky="ew", pady=(10, 4)) ttk.Label(frame, textvariable=status_var).grid(row=3, column=0, columnspan=4, sticky="w", pady=4) log_box = tk.Text(frame, height=18, wrap="word") log_box.grid(row=4, column=0, columnspan=4, sticky="nsew", pady=(8, 0)) scroll = ttk.Scrollbar(frame, orient="vertical", command=log_box.yview) scroll.grid(row=4, column=4, sticky="ns", pady=(8, 0)) log_box.configure(yscrollcommand=scroll.set) def log(message: str) -> None: def append() -> None: log_box.insert("end", message + "\n") log_box.see("end") root.after(0, append) def start_extract() -> None: in_text = input_var.get().strip() if not in_text: messagebox.showerror("Missing input", "Select an .IND file or a folder first.") return input_path = Path(in_text) output_dir = Path(output_var.get().strip()) if output_var.get().strip() else None def worker() -> None: try: root.after(0, progress.start) root.after(0, lambda: status_var.set("Extracting...")) results = extract_input(input_path, output_dir, log=log) root.after(0, lambda: status_var.set(f"Done: {len(results)} pair(s) extracted.")) except Exception as exc: root.after(0, lambda: status_var.set("Error")) root.after(0, lambda: messagebox.showerror("Extraction error", str(exc))) log(f"ERROR: {exc}") finally: root.after(0, progress.stop) threading.Thread(target=worker, daemon=True).start() ttk.Button(frame, text="Extract", command=start_extract).grid(row=5, column=3, sticky="e", pady=10) root.mainloop() def build_arg_parser() -> argparse.ArgumentParser: parser = argparse.ArgumentParser(description="Extract Europe Racer .IMG/.IND resource pairs") parser.add_argument("input", nargs="?", help=".IND file or folder containing .IND/.IMG pairs") parser.add_argument("-o", "--output", help="Output folder") parser.add_argument("--limit", type=int, help="Extract only the first N entries for testing") parser.add_argument("--gui", action="store_true", help="Launch GUI") parser.add_argument("--no-gui", action="store_true", help="Run from command line") return parser def main(argv: Iterable[str] | None = None) -> int: parser = build_arg_parser() args = parser.parse_args(argv) if args.gui or (not args.no_gui and not args.input): run_gui() return 0 if not args.input: parser.error("input is required in --no-gui mode") try: paths = extract_input( Path(args.input), Path(args.output) if args.output else None, limit=args.limit, log=print, ) except Exception as exc: print(f"ERROR: {exc}", file=sys.stderr) return 1 print("Extracted:") for path in paths: print(f" {path}") return 0 if __name__ == "__main__": raise SystemExit(main())2 pointsJust to clarify a few things: I copied what I had already said in my first post, and added that the format seemed complicated based on what others on the forum were saying about it back in May. About the source/comments being in Portuguese, i'm actually from Brazil, and the script was originally in Portuguese. I only asked GPT to translate the script to English for convenience lol, so my bad for not making that clear right away. It generated tons of different versions of the script while trying to get it right, but this was as far as it got. Regarding "KMDExtractor", I didn't use it because I didn't even know it existed.2 points2 pointsWas heavily tied up in other stuff - including building up my utility library for other projects (that would include this), I'm hoping to have an OSS release at some point this week, the tool has undergone major refactoring under the hood and I've figured out where the game handles those invalid version meshes, along with texture bindings, etc. With the upgrades to my utility library the tool will support more formats such as SMD, FBX, etc.
 2 pointsHere you go - plugin for Blender 5.0 Imports meshes, skeletons, animations and textures Some animation files may fail to import (could not figure it out) io_scene_until_dawn_demo.zip2 pointsWell, it's too poor to be released. But I pmed you what I had so far, Dec. 24, recompiled.1 pointAfter having searched through many too many senseless (?) blocks I finally got this (deepforest):
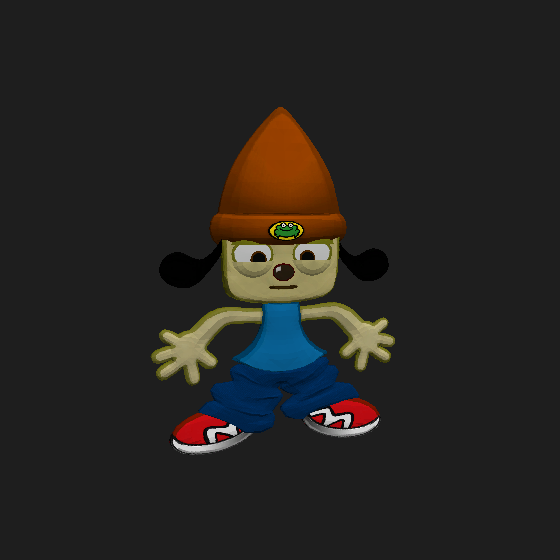
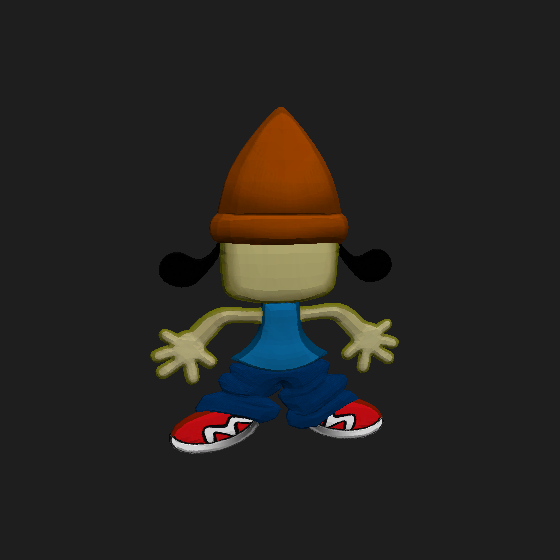
 1 point1 point100% I'm planning on doing it for all of the games, they all use the same engine with slightly different modifications.1 pointFor the 3D models, maybe you can take a look at Murugo's Blender script, that might help. For the textures, maybe the findings I posted in an another thread might help. https://reshax.com/topic/702-ps2-tokimeki-memorial-3-textures/1 point1 pointAre you trying to modify the font? I'm not sure about importing, but exporting is easy with existing tools. The character order is oddly arranged. e.g.
 1 pointYou can easily convert it to the qbms code. ############################## get BaseFileName basename idstring "CRAP" get Version ushort get CRPRStrLen ubyte getdstring CRPResourceName CRPRStrLen getdstring Dummy 0x5 get StrLen ubyte getdstring TrackName StrLen get ResourceCount uint32 get DataBaseOffset uint32 for i = 0 < ResourceCount get Unknown_0 uint32 get StrLen ubyte getdstring ResourceName StrLen get MD5StrLen ubyte getdstring MD5 MD5StrLen get Unknown_1 uint32 get ResourceOffset uint32 get Unknown_2 uint32 get ResourceSize uint32 math ResourceOffset + DataBaseOffset string Name p "%s/%s.dat" TrackName ResourceName log Name ResourceOffset ResourceSize next i The first file is some kind of TOC, second are data and rest are PNG's with some metadata on start.1 pointI did amend my QuickBMS extraction script, so hopefully nobody is still using a really old one. This will extract the mesh data blocks - file 512 is the vertex data, 533 is the face data (0xFF-terminated strips). The first 2 sections are bone info and texture names, which I haven't done anything with as yet. If I knew the exact structure of the submesh info at the end of the file, a script would be possible, but it's a horrible format as far as I can see. Doing it manually for each submesh is no fun: jmodel.zip
 1 pointHi Thanks for the reply. https://mega.nz/file/8E91gQ5R#ZSFpInsbTl4mVMbnm5dJB9fyu7aoWfvX9eEpatwfd4I He is the file Thanks1 pointadded support, only extracts audio currently as I've no clue how the 3d models (AMPC) knows it's offsets https://github.com/smiRaphi/UniPyX (https://github.com/smiRaphi/UniPyX/commit/46a9f811f79d84a93e8ec9f3480f717ab25e54b6) Also to play the audios, you'll need a player that supports this specific format, only one I know is: https://github.com/librempeg/librempeg1 pointHello, here Blender 5.0 plugin There are some stubs in code which may fail importing since there are too few samples provided Ttextures must be placed in the same directory as *.pmdl if you want plugin to load them for you io_scene_sd_gundam_g_generation_cross_rays.zip
 1 pointWorking on a tool for this currently, fixing normal and specular mapping then will release!
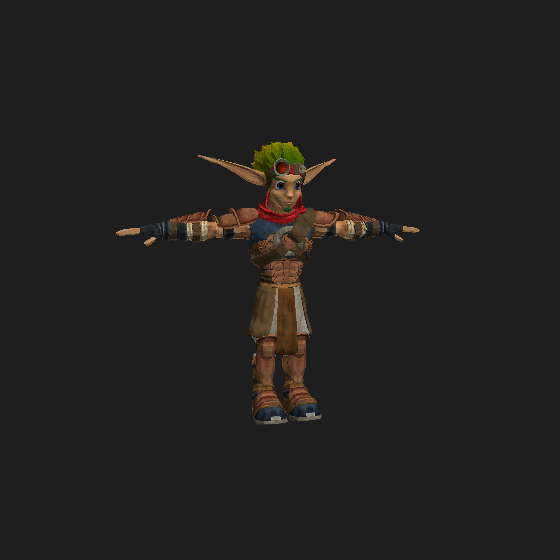
 1 point1 pointHi everyone, I am currently working on a fan translation and localization project for Dante's Inferno on the PS3. (Polish TRANSLATE) I have successfully extracted and edited the game text, but I am facing a major roadblock with the rebuilding stage. Specifically, I need to pack and compress my modified .lh2 files back into the original .ols container archive format. It is absolutely crucial that the original file structure and directory layout are strictly preserved so the PS3 runtime can read the assets without throwing errors. I've tried standard extraction tools, but recompiling them back properly has been tricky and often causes crashes. Could anyone recommend a specific script, a tool, or the correct command-line arguments to repack these files into .ols while maintaining the native compression structure? Any help, templates, or guidance would be highly appreciated. Thanks in advance!1 pointWould you mind releasing this tool and its source code please?1 point1 pointHere it is (only works for Watch Dogs 1). Blender249[WatchDogs][PC][xbg][2014-10-25].zip1 pointMafia 3 DE Danny Burke Head.rarim just going to upload the full extraction of the head im trying to get, theres textures in there and all, folder "models" and folder "blueprints" has the .compiled in there1 pointJust a quick note - the decompressed length and file offset values seem to be actually 5-byte/40-bit values, due to some archives being over 4 GB, with the same format used in quite a few other PS3/PC games, such as Captain America: Super Soldier, Infamous, Naughty Bear, Warhawk, Ghost Of Tsushima, among others.1 pointHmm, thanks for letting me know, I'll have to look further in to that. The files are definitely longer, and if I preview them in Game Extractor (Full Version) they extract fully and convert using FFMPEG, but if I extract them to my PC, they only end up being 64KB in size, like you report, so there's a bug in there somewhere. I've looked at 2 of the large RDB and RDB+BIN files, and they have this format: +-----------------------------------------------+ | God of War: Ascension [PS3] *.rdb.bin + *.rdb | +-----------------------------------------------+ // The .RDB.BIN file contains the file data, the .RDB file contains the directory // File Data is compressed using ZLib in blocks of 16384 bytes uncompressed // RDB FILE // HEADER 8 - Header (_DRK0000) 4 - Unknown (32) 4 - Unknown (10) 4 - Number of Files 4 - Unknown X - Directory Name ("data/") 1 - null Directory Name Terminator 0-3 - null Padding to a multiple of 4 bytes // DETAILS DIRECTORY // for each file 8 - Header (IDRK0000) 8 - File Entry Length (not including padding) 8 - Unknown (14/15) 4 - Unknown 4 - null 4 - Extra Data Length 4 - Unknown 4 - Unknown 4 - Unknown 4 - Unknown 4 - Unknown if (extraLength == 1){ 13 - Extra Data } else { X - Extra Data (optional) (length = ExtraData*4) } // if not the last file X - File Offset and Length String (2 Hex Strings with "@" between them) 1 - null Hex String Terminator 0-3 - null Padding to a multiple of 4 bytes // RDB.BIN // FILE DATA // for each file 8 - Header (IDRK0000) 8 - Compressed File Length (including all header fields) 8 - Compressed File Length (File Data only) 8 - Decompressed File Length 4 - Unknown 8 - Unknown 4 - Unknown (BIG) (4096) 4 - Unknown 4 - Number of Header Blocks if (numHeaderBlocks != 0){ // for each header block 4 - Unknown 4 - Unknown 4 - Unknown 4 - Unknown 4 - Unknown (0/1) } X - Padding (byte 255) to a multiple of 8 bytes // for each compressed block 4 - Compressed Block Length X - Compressed Data Block (ZLib Compression) 4 - null End of Compression Indicator ... there are no filenames in these archives. When I analyse them, most of the files have some kind of header to identify what they are, but they are all custom formats, I couldn't find anything standard at all, and even struggled to figure out what kind of content is supposed to be in them, tbh.1 pointNo, I am from Mexico, lol. OK here is TgMD script; It searches for kmdps/kmdp and then it searches for verts/normals/uv tags on each file. Strip flags are in UV buffer. It does not read textures or skeleton. I will try to check the skeleton later, it looks similar to Silent Hill 2/3/4(matrix 4x4 and bone parent table). It seems like all kmds have a copy of the same skeleton but I don't know why.... Anyway, here is the script: fmt_tenchu_fs_ps2_tgmd.py1 pointThat is a big script, lol. Mine reads only kmds, then I made other for kmdp and finally I made other to read kmds and kmp from .TgMD container but without textures. TgMD has a table with pointers to all kmds/kmdp and textures but mine does not read textures yet, lol. And I fixed the strips. Check this:
 1 pointRule 17 does not forbid it. But for ai generated scripts it should be mandatory, imho, to provide the link to the basic source(s), here, in this monster of a script (76 kB!), there's a hint, only: so there's only wild guessing which source is meant, maybe here? (but is a c sharp source) The real source seems to be portuguese ("# Base sempre usada nos modos finais."). edit:1 point1 pointIt all depends on what you're looking for - these files have more than just TIM images and I3D meshes in them.1 pointCan be viewed with grapfic tools. Some "splitting" required, I guess (map.ivi): (there should be color, shouldn't it?)
 1 point1 pointThanks, but these file offsets don't help too much (it's easier to track 742 mesh files by the string 'I3D_I'). 'I3D_I3M' less often, 597x. File offsets, yfolder1.fld for example 0x1DE68, 0x1E28D instead of 0x1E000 or 1E28D, 2246D instead of 0x220001 point1 pointHere is experimental version of dump tool for full version of Battlefield 6. (attached in the end of this post) For almost a whole year now since beta versions it was possible to use my set of tools to get ANY files from it, be that beta or full version. The only problem was "update" folder that was not supported as it is. To get it dumped, you had to move files from update folder to data folder. Each subfolder inside "update" has "data" inside, and you have to move contents to main "data" folder. It does not overlap and work as intended. Now i made this new version which must scan update folder and add data from it. Important change of .INI file is that now game path must NOT include "data" in the end: C:\games\bf6 D:\dump all After dumping, you can use same set of tools from here: bf6_update.7z1 pointThanks! Here's hahen-d.mdl (from bg\stg01): and bg_s18:
 1 pointLet the SLPS in the same folder of out2.car and use this script below in quickbms selecting out2.car #Konjiki no Gashbell extractor by Rabatini open FDSE "SLPS_254.40" 1 get ARCHIVE_SIZE asize 0 get SLPS_SIZE asize 1 set BASE_LSN long 311 set VADDR_BASE long 0x247A80 set FILE_BASE long 0x148A80 set SCAN_START long 0x001000 math SCAN_END = SLPS_SIZE math SCAN_END - 0x1c set FOUND long 0 for POS = SCAN_START < SCAN_END goto POS 1 get NAME_PTR long 1 get TAG long 1 get LSN long 1 get SECTORS long 1 get ALLOC long 1 get SIZE long 1 get FLAGS long 1 if TAG == 0xFFFFFFFE math EXPECT = SECTORS math EXPECT * 0x800 if EXPECT == ALLOC if SIZE > 0 if SIZE <= ALLOC math OFFSET = LSN math OFFSET - BASE_LSN if OFFSET >= 0 math OFFSET * 0x800 math END_OFF = OFFSET math END_OFF + SIZE if END_OFF <= ARCHIVE_SIZE set DUP long 0 for J = 0 < FOUND getarray OLDLSN 0 J if OLDLSN == LSN set DUP long 1 break endif next J if DUP == 0 putarray 0 FOUND LSN math FOUND + 1 string NAME p= "files/%05d_%08x_%08x.bin" FOUND LSN SIZE # tenta resolver o nome pelo ponteiro da entrada math NAME_OFF = NAME_PTR math NAME_OFF - VADDR_BASE math NAME_OFF + FILE_BASE if NAME_OFF >= 0 if NAME_OFF < SLPS_SIZE goto NAME_OFF 1 getct TMP string 0x00 1 if TMP != "" string NAME = TMP endif endif endif log NAME OFFSET SIZE 0 endif endif endif endif endif endif endif # o for adiciona +1 no next, então aqui somamos +3 = passo real de 4 bytes math POS + 3 next POS Konjiki no Gashbell extractor by Rabatini.zip1 point1 pointThe .etc files are compressed with gzip, so you can extract those with 7-zip. The decompressed files are ETC2 images, not sure about everything that's in the header, but the data seems to start at 0x14. So this one is from unit-DEFAULT, which seems to be 2048 x 256, ETC2_RGBA:
 1 pointA process has been detailed here https://docs.google.com/document/u/0/d/e/2PACX-1vTzfKaEfN4mnHbnBWCzrGUMQon_2tnTCl7WhR9eByxchR-H1FBN186k5Nh-9OySC5zAAHeLxOtcpwcY/pub?pli=1 byWistfulHopes.1 pointYou can also find it here if you do CTRL + F and search GOTG https://ia800801.us.archive.org/view_archive.php?archive=/30/items/xentax.7z/attachments.zip1 pointThis is an archive of the useful list originally from https://forum.xentax.com/viewtopic.php?t=15540, which seemed a fitting first topic for graphic file formats. Some links are broken because they pointed to internal downloads on Xentax :'(, but most work :). ------------------------------------------------------------------------------------------------------------------------ Post by ikskoks » Fri Nov 25, 2016 2:13 pm TextureFinder 1.3.2 Designed to find textures inside any uncompressed files. Any size, any pixel bit format, any binary file. It only requires that the file be uncompressed. This tool is intended to be used by researchers and developers with a good understanding of bitmap formats. VERSION 1.3.2 is the last one of this first series. Formats implemented so far: TRUE COLOUR (RGBA) FORMATS : 64bits 16x4 48bits 16x3 32bits 8888 24bits 888 16bits 565 15+1bits 1555 12+4bits 4444 08+8bits 8332 08bits 332 06+2bits 2222 PALETTE FORMATS : P8 256 colours P4 16 colours P1 2 colours QUAD FORMATS (alpha channel implemented only in series 2) : DXT1 DXT3 DXT5 TextureFinder 2.1 Newer and better version of TextureFinder. Tile Molester 0.16 Tile Molester, or TM for short, is a program that facilitates the viewing and editing of raw graphics data; that is, graphics contained in arbitrary binary files, where one usually doesn't have initial knowledge about the location and/or format of the graphics. The main area of application thus far has been videogame console binaries. In most cases, these files contain a large variety of data, not just graphics -- sound data and actual game code are two examples. Collections of data in one and the same file may be interspersed in any conceivable fashion, subject to hardware/software-constraints of the intended runtime-environment as well as the decisions made by the producers of the binary (the developers). TM is a kind of visual explorer of such files, in that it allows the file contents to be interpreted and displayed in a multitude of ways. By perusing the file and tweaking the settings of the renderer, the binary data that corresponds to graphics may be made accessible in the way they are intended, and edited to the satisfaction of the user. TiledGGD 2.0.3.0 A generic graphics dumping tool, based on the elusive program GGD TiledGGD - basically it’s GGD (General Graphical Dump tool), with some extra features: Currently working (extra) features: * Support for tiled graphics (tiles of any size) and palettes (tile sizes are restricted, because they need to fit a 16*16 grid) * Copy visible graphics and palette directly to clipboard * ‘Go To Offset’ functionality * Toggle Endianness of graphics and palette separately * Save the entire graphics * Built-in NCGR/NCBR and NCLR support (I’m not using all the data from the files, so there are most likely still some bugs) * Lua plugin support DOWNLOAD TOOLS If you know any other useful programs to search for graphics in files, you can share here. 🙂 ------------------------------------------------------------------------------------------------------------------------ Post by ikskoks » Sun Jun 18, 2017 3:39 am Rainbow is a tool intended to convert different graphics formats from video games assets to and from user editable images (like png). It currently supports almost every variant of the TIM2 format. The main difference with other great tools like Tile Molester and Crystal Tile 2 is to provide direct support to proprietary graphics formats found in "new generation" consoles, like PS2, PSP, Wii, etc., instead of dealing with just the raw image data. Features The underlying image library has almost complete support to TIM2 texture files usually found in PS2 and PSP games. The app supports multi-layer, multi-clut, swizzled (PSP)/unswizzled TIM2 images with both linear, interleaved palettes, and segments headers eventually extended with custom user data (usually used by programmers). Can open textures in any format supported by the underlying image library. Can open whole folders in search of supported texture formats. All known texture files are then displayed in a list. Can export and import textures in suitable image formats for editing (like png). Any additional information specific to the texture is preserved when exporting/importing (like the TIM2 header data), in order to have a one-to-one correspondence with the original texture. Customizable background color for transparent and semi-transparent images with chessboard like pattern. Finally, Rainbow supports parameters via command line: the first parameter is the name of a texture you would like to open. DOWNLOAD Console Texture Explorer (PSP/PS2) is an application that allows working with PSP and PS2 textures. It helps to minimize manual work during texture resources manual scanning and graphics data research in raw archives. Version: 1.0b Designed and made by: Dageron Year: 2012 ====== Supported platforms: PSP and PS2 Supported formats: any texture dictionaries with 4bpp/8bpp graphics data DOWNLOAD ------------------------------------------------------------------------------------------------------------------------ Post by ikskoks » Sun Jun 03, 2018 7:04 am Raw texture previewer/converter Download here: viewtopic.php?f=18&t=16461 ------------------------------------------------------------------------------------------------------------------------ Post by ikskoks » Mon Jul 16, 2018 2:28 am PVRTexTool Download: https://community.imgtec.com/downloads/windows-installer-powervr-tools-and-sdk-2018-r1/ ------------------------------------------------------------------------------------------------------------------------ Post by ikskoks » Mon Aug 10, 2020 7:29 am Cheat Engine - Graphical Memory View CHEAT ENGINE DOWNLOAD ------------------------------------------------------------------------------------------------------------------------ Post by ikskoks » Tue Sep 08, 2020 11:52 am AMD Compressonator --> https://gpuopen.com/compressonator/ https://github.com/GPUOpen-Tools/compressonator ------------------------------------------------------------------------------------------------------------------------ Post by ikskoks » Wed Oct 21, 2020 11:35 am Some new tools are listed here --> https://tcrf.net/Help:Contents/Finding_Content/Finding_graphics ------------------------------------------------------------------------------------------------------------------------ Post by ikskoks » Tue Dec 15, 2020 6:01 am RAW pixels viewer This application allows you analyze raw image data, you can display memory dumps of frame buffers, video buffers and uncompressed video files. Play with image parameters below to explore world of colors. https://imgur.com/a/ZJQtO8B http://rawpixels.net/ ------------------------------------------------------------------------------------------------------------------------ Post by ikskoks » Thu May 20, 2021 10:32 am TileShop and ImageMagitek TileShop is a WPF application for Windows that implements ImageMagitek and allows end-users to manage specialized graphics in a modern GUI environment. ImageMagitek is an internal .NET library written in C# to view, edit, and organize common and complex retro videogame system graphics. Emphasis is given to the features most valuable to the common, cumbersome tasks when encountering graphics embedded within binaries without any distinguishable headers or identifiers. Exporting and importing is supported to allow advanced editing features to be performed in third-party image editors that operate on standard PNG. https://github.com/stevemonaco/ImageMagitek ------------------------------------------------------------------------------------------------------------------------ Post by th3ru » Sat Jun 05, 2021 11:33 am Raw Image Viewer module of Kuriimu2. + live preview as you change parameters. - no drag&drop, to be launched from K2, extracts only to png. https://github.com/FanTranslatorsInternational/Kuriimu2 ------------------------------------------------------------------------------------------------------------------------ Post by ikskoks » Thu Nov 04, 2021 12:25 pm Mumm-Ra's Game Graphics Tool Download: old version -> https://drive.google.com/file/d/1ZeRQcU-cqOO5gdRGV_kgvsrq_jBoCFgH/view?usp=sharing version 96 -> https://drive.google.com/file/d/1kw1YVDzPATMCS5fZYDTiPwosqhGjVpmO/view version 100 --> https://drive.google.com/file/d/1mc8gGTt_O7HpcthqXQfEc30TgV_2f4ze/view ------------------------------------------------------------------------------------------------------------------------ Post by Sharppy » Sun Nov 07, 2021 8:51 am Pixel Reader by Leo2236 Open any file to view it in pixel format Creator Site http://lgt.createaforum.com/index.php ------------------------------------------------------------------------------------------------------------------------ Post by ikskoks » Fri Dec 23, 2022 4:23 am TextureFinder by Durik256 (Noesis) [updated 2023-11-26] Download: https://github.com/Durik256/Noesis-Plugins/blob/master/tool_TextureFinder.py Original usage instructions: https://web.archive.org/web/20231012104059/https://forum.xentax.com/viewtopic.php?t=26113 ------------------------------------------------------------------------------------------------------------------------ Post by ikskoks » Tue Dec 27, 2022 6:33 am GIMP - Load Image from Raw Data How to use this functionality: 1. Download GIMP 2.10 2. Change your file's extension to *.data 3. Open GIMP 4. Go to File > Open in GIMP 5. Load your *.data file in GIMP 6. Click "Open" in the new window. ------------------------------------------------------------------------------------------------------------------------ Post by th3ru » Mon Mar 06, 2023 7:47 am PixelDbg - view any type of file as image data, using a number of different formats. Downloads: https://sourceforge.net/projects/pixeldbg/ (source + binaries for Windows and Linux) (originally found on tcrf | not tested personally) ------------------------------------------------------------------------------------------------------------------------ Post by ikskoks » Tue Oct 24, 2023 4:16 am Game Extractor
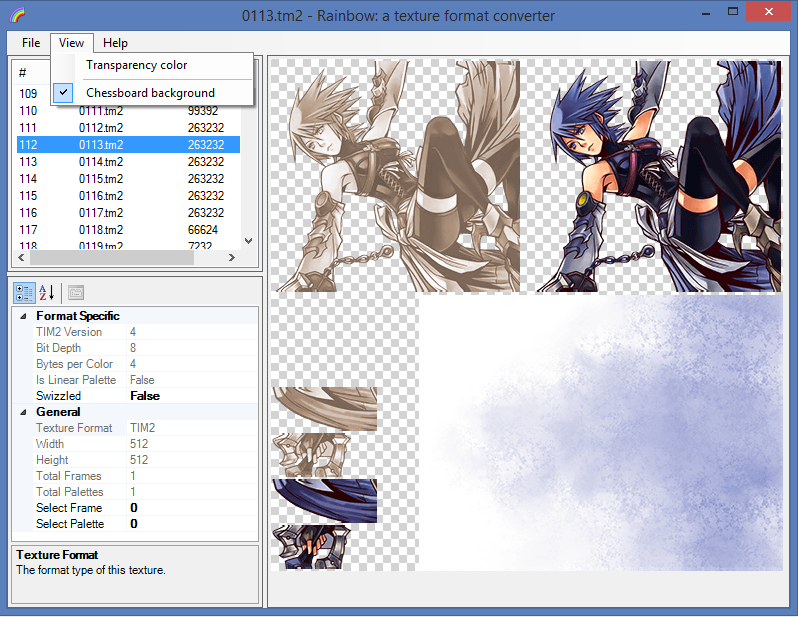
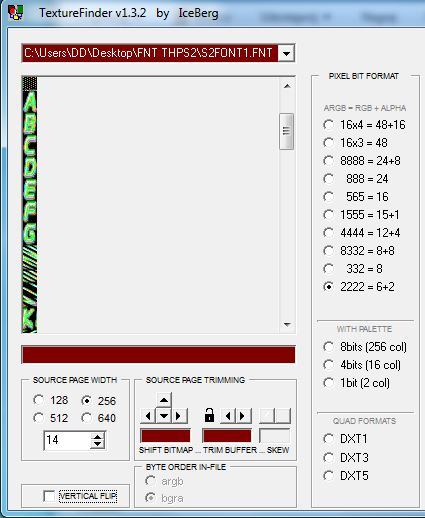
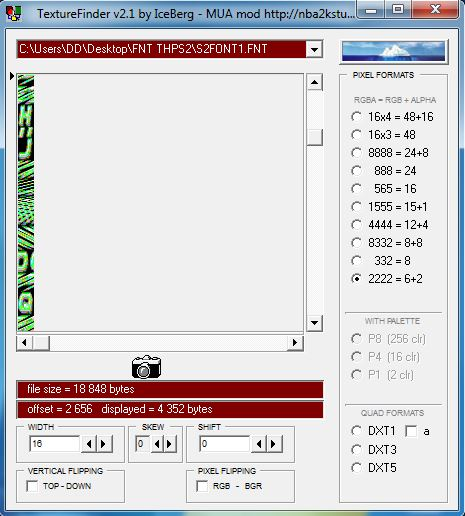
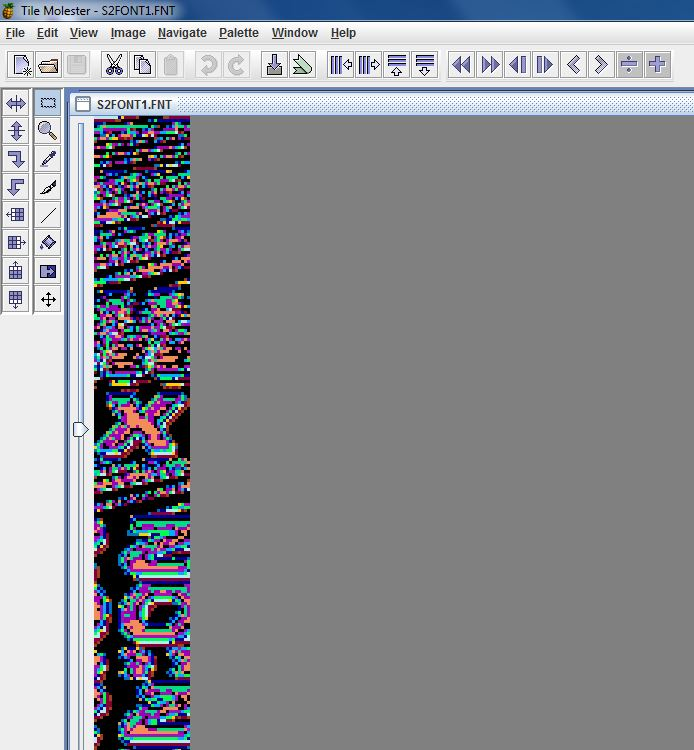
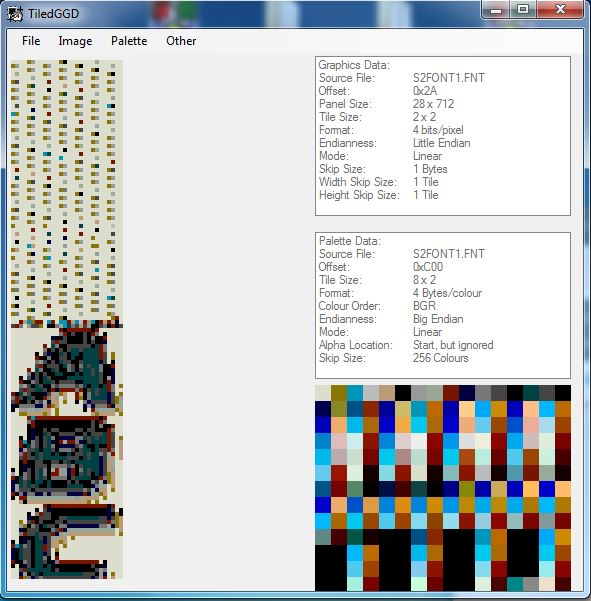
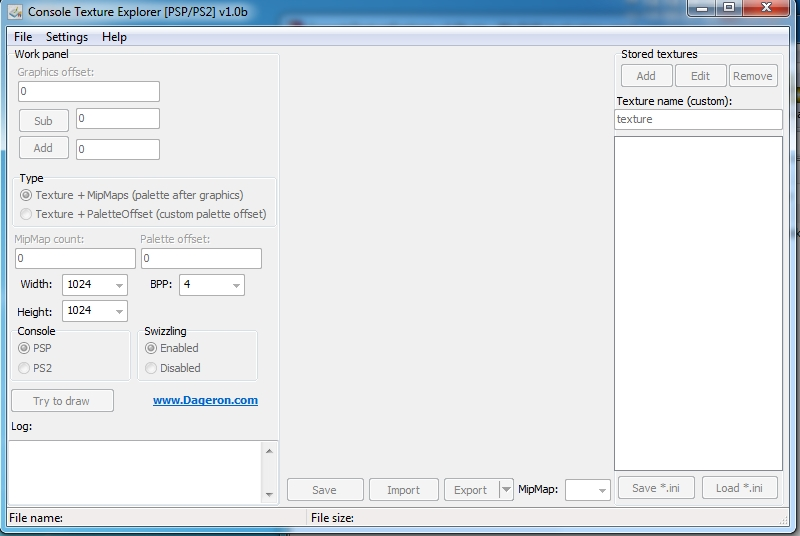
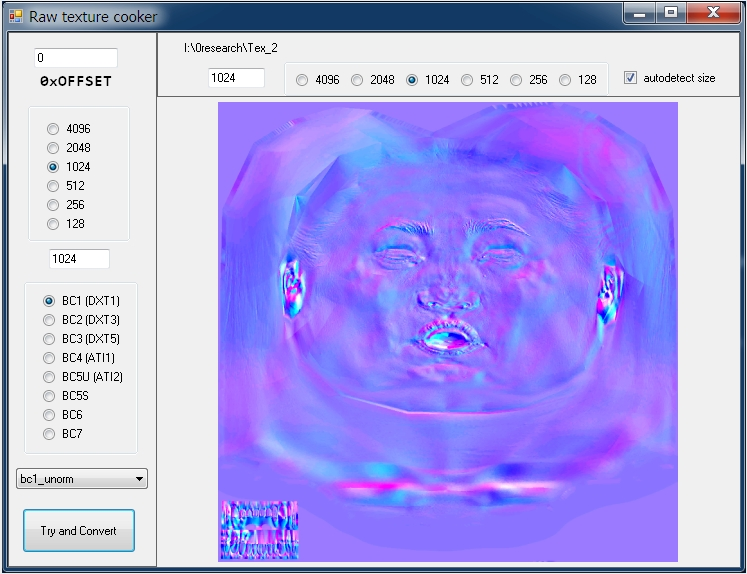

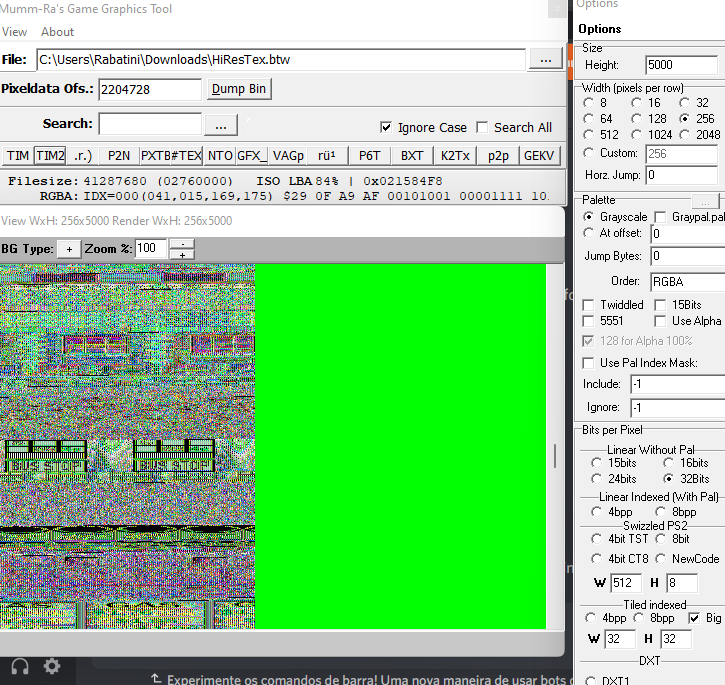
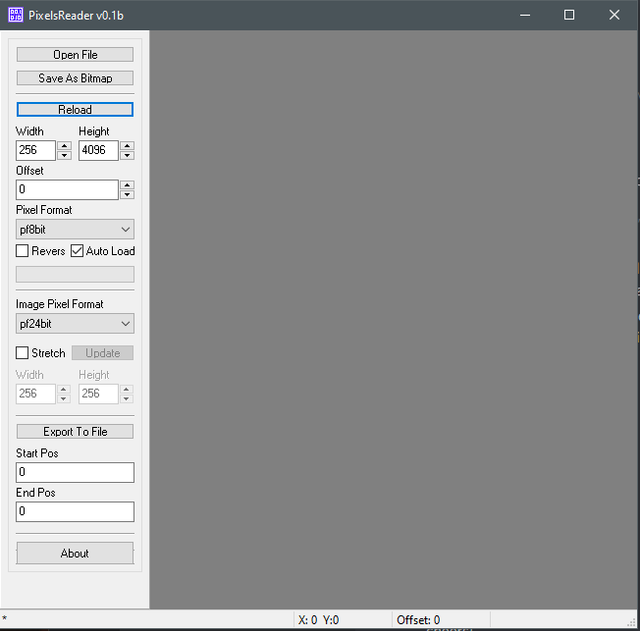
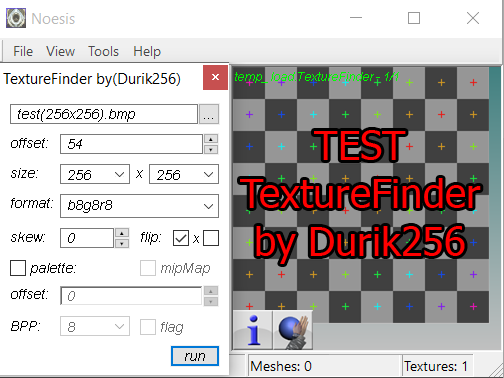

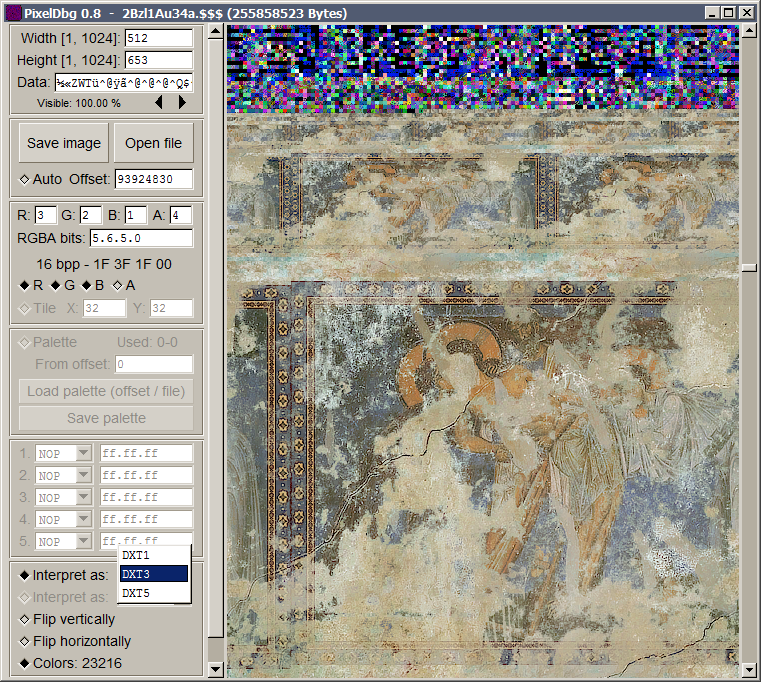
 1 pointDrag and drop .index files into the script, it will automatically parse streamed.resources and extract sounds. streamed.py streamed.zip
.thumb.png.c09c1d8af0948c551ca36af743253048.png) 1 pointThis project looks kinda abandoned, to be honest. Since you wrote you don't know jack about hex or anything like that I wasn't sure to upload an unfinished Make_obj exe in fear of the confusions it could cause. Anyways here's the latest obj file from Gantz I could find which is obviously the one from here: testGantzFakeTriStrips.zip1 point1 pointI didn’t delve into the topic, but if you just need to replace the magic check in the code, then I made the replacement in line 73 in the MAS2Reader.cs file: if (fileTypeString == "GMOTOR_MAS_2.90") to if (fileTypeString.EndsWith("_MAS_2.90")) so it will be universal. I also build this in VS: MAS2Extract.7z1 point
1 pointThis project looks kinda abandoned, to be honest. Since you wrote you don't know jack about hex or anything like that I wasn't sure to upload an unfinished Make_obj exe in fear of the confusions it could cause. Anyways here's the latest obj file from Gantz I could find which is obviously the one from here: testGantzFakeTriStrips.zip1 point1 pointI didn’t delve into the topic, but if you just need to replace the magic check in the code, then I made the replacement in line 73 in the MAS2Reader.cs file: if (fileTypeString == "GMOTOR_MAS_2.90") to if (fileTypeString.EndsWith("_MAS_2.90")) so it will be universal. I also build this in VS: MAS2Extract.7z1 point


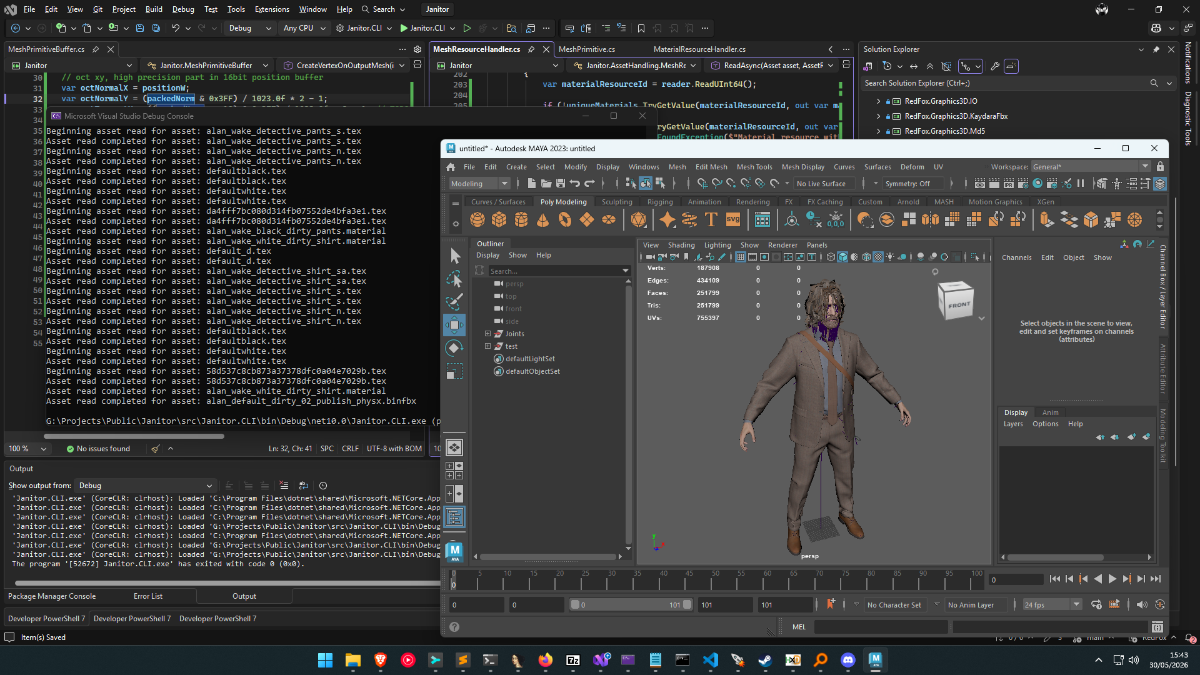
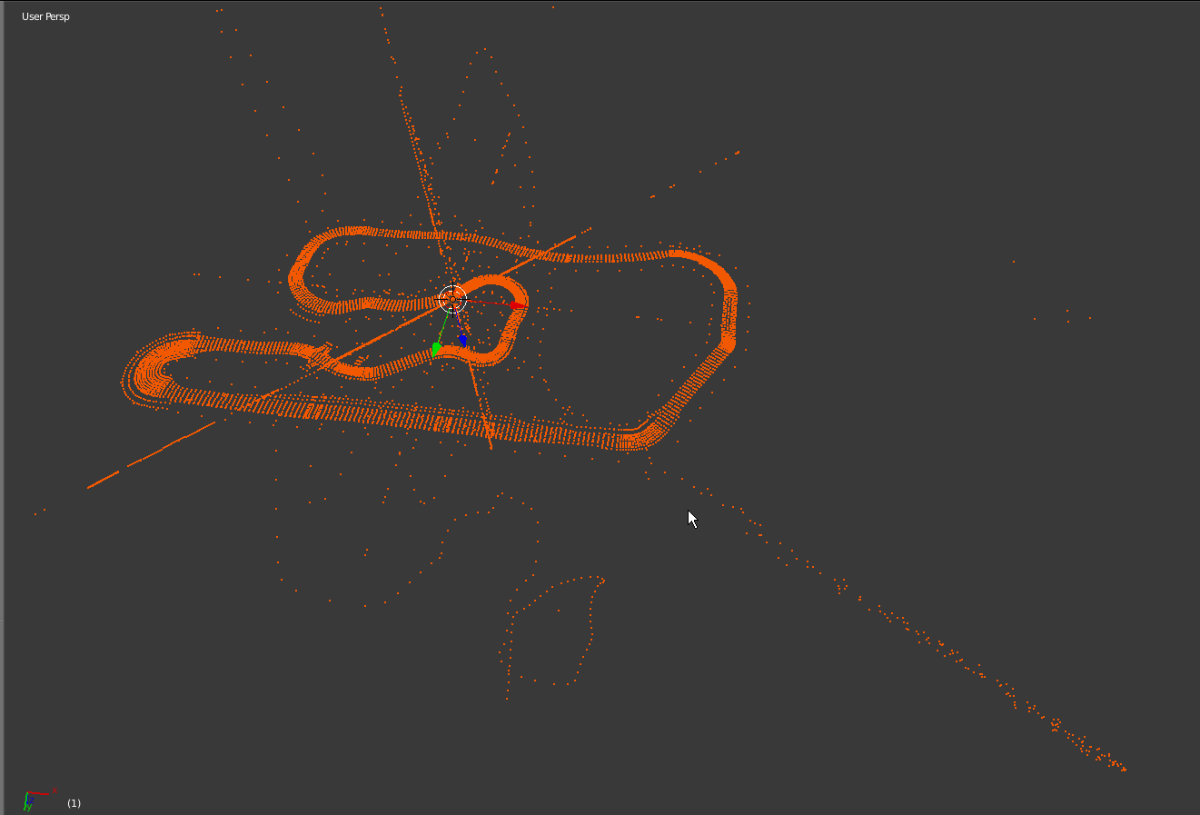


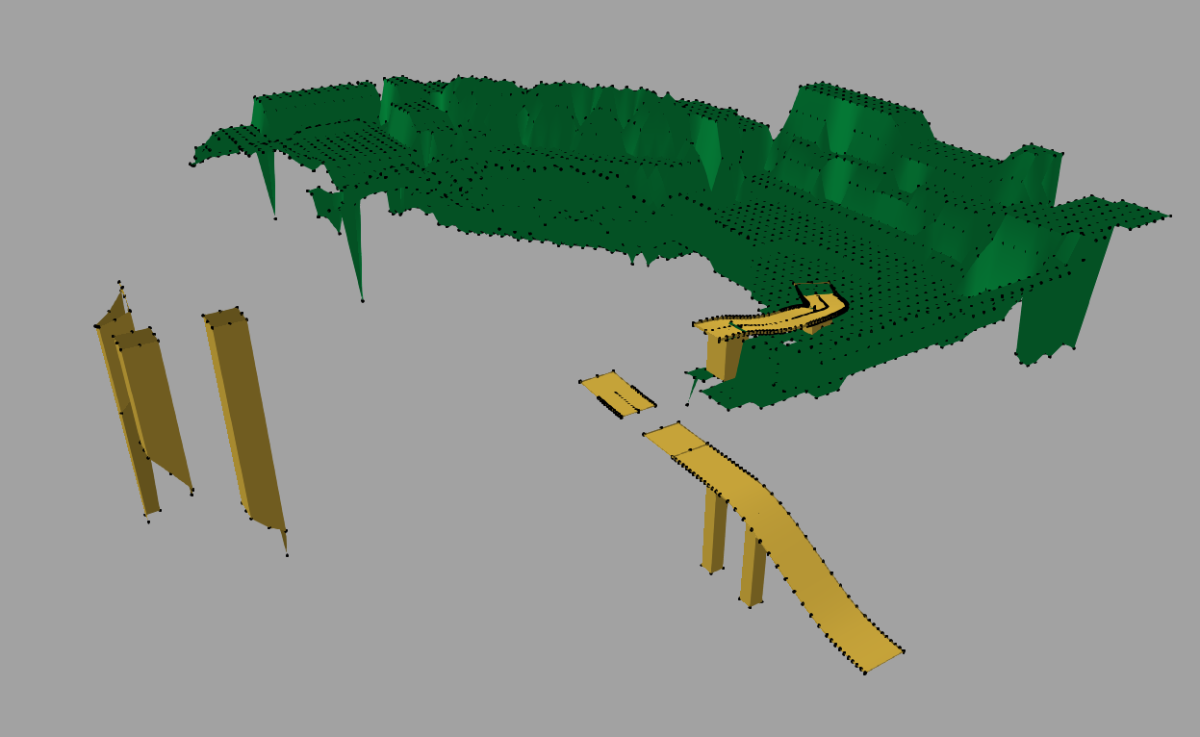


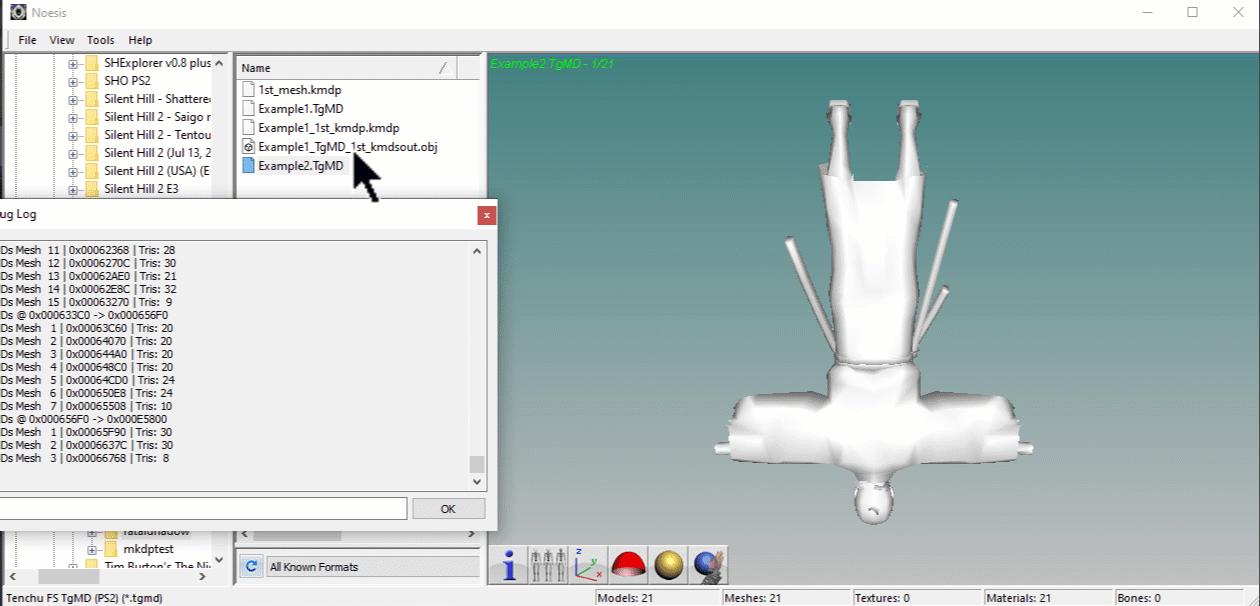
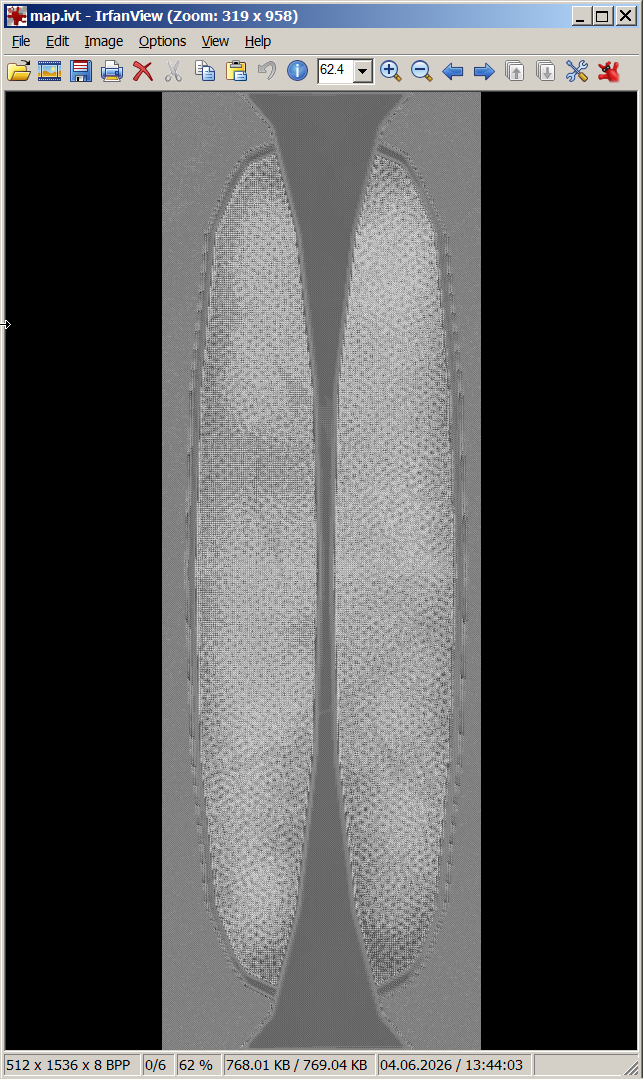


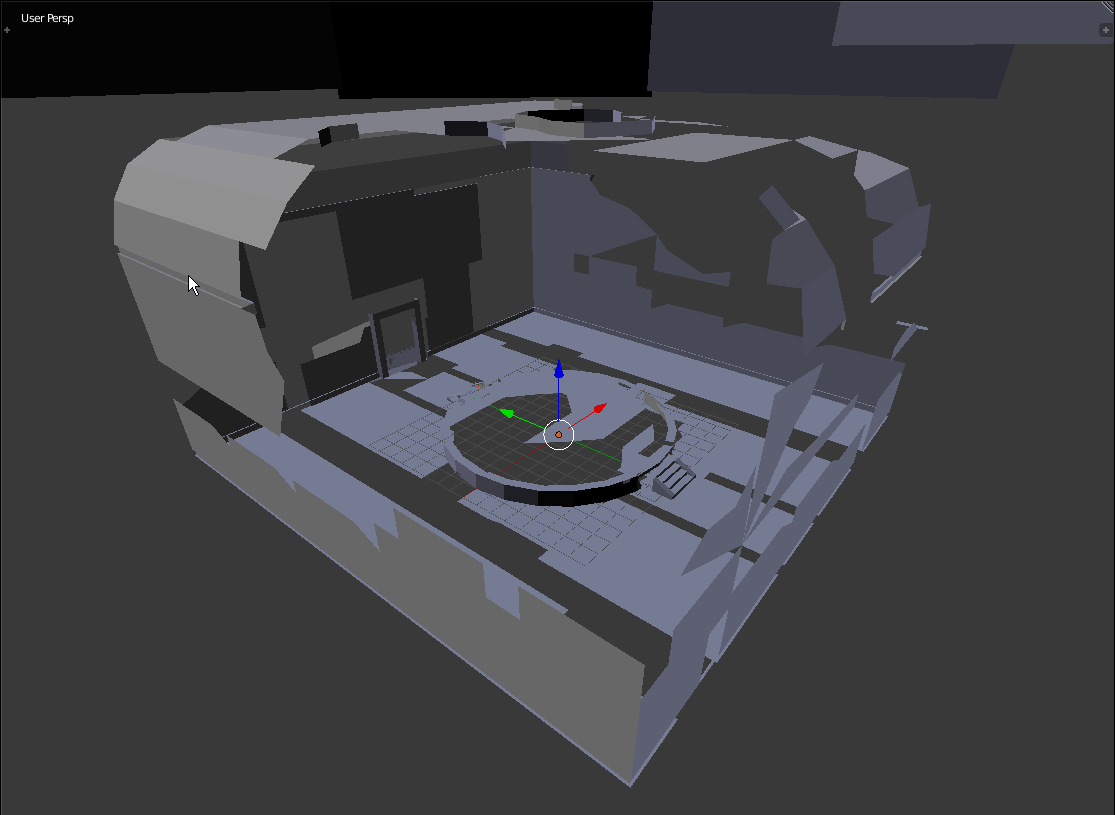


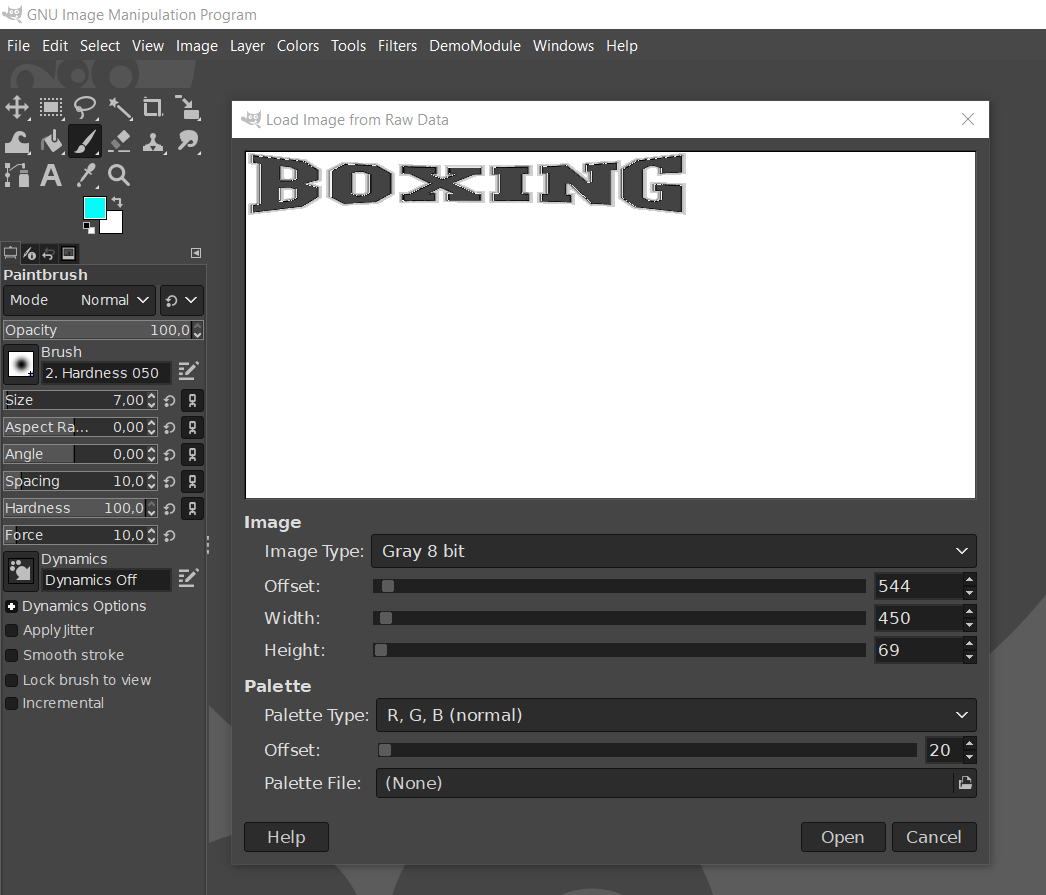

.png.ccf09f34bfa6b931b357fdc6d96ded37.png)